Initial Setup
Before we begin to start writing plugin code, we will need to do some setup work. We will be using the dvp tool, which is described in the Getting Started section.
The quoted examples in this section assume you're working on a Unix-like system.
Quick Check
First a reminder that it's highly recommended that you develop your plugin in a virtual environment.
Next, make sure you have a Delphix Engine ready to use, as described in the Prerequisites section on the previous page.
Finally, let's quickly make sure that dvp is working! Type dvp -h and you should see something like the following:
(venv)$ dvp -h
Usage: dvp [OPTIONS] COMMAND [ARGS]...

  The tools of the Delphix Virtualization SDK that help develop, build, and
  upload a plugin.

Options:
  --version      Show the version and exit.
  -v, --verbose  Enable verbose mode. Can be repeated up to three times for
                 increased verbosity.
  -q, --quiet    Enable quiet mode. Can be repeated up to three times for
                 increased suppression.
  -h, --help     Show this message and exit.

Commands:
  build          Build the plugin code and generate upload artifact file...
  download-logs  Download plugin logs from a target Delphix Engine to a...
  init           Create a plugin in the root directory.
  upload         Upload the generated upload artifact (the plugin JSON
                 file)...
If this looks good, you are ready to begin!
If, instead, you see something like the following, go back to Getting Started and make sure you setup everything correctly before continuing.
Creating a Bare Plugin
To start, we will create a new directory where our new plugin code will live.
Now that we are in our new plugin directory, we can use the dvp tool to create a plugin for us. This plugin will be a mere skeleton -- it will not do anything useful until we modify it in the subsequent pages.
The -n argument here means "plugin name." We are using the name first_plugin.
The -s argument tells which syncing strategy we want to use.
The -t argument tells which host platform our plugin supports.
You can type dvp init -h for more information about the options available.
After running this command, you should see that files have been created for you:
These files are described below:
| File | Description |
|---|---|
plugin_config.yml |
The plugin config file, which provides a list of plugin properties |
schema.json |
Contains schemas which provide custom datatype definitions |
src/plugin_runner.py |
A Python file which will eventually contain code that handles plugin operations |
Open these files in your editor/IDE and take a look at them. At this point they will not have a lot of content, but we will add to them as we go through the next few pages.
Building The New Plugin
The new files we created above have to get built to produce a single artifact. This is done with the dvp tool.
After the build, you should see that the build process has created a new file called artifact.json.
Uploading The New Plugin
Now using the dvp tool we can upload the artifact onto our Delphix Engine.
The -e argument specifies the engine on which to install the plugin, and the -u argument gives the Delphix Engine user.
You will be prompted for a password.
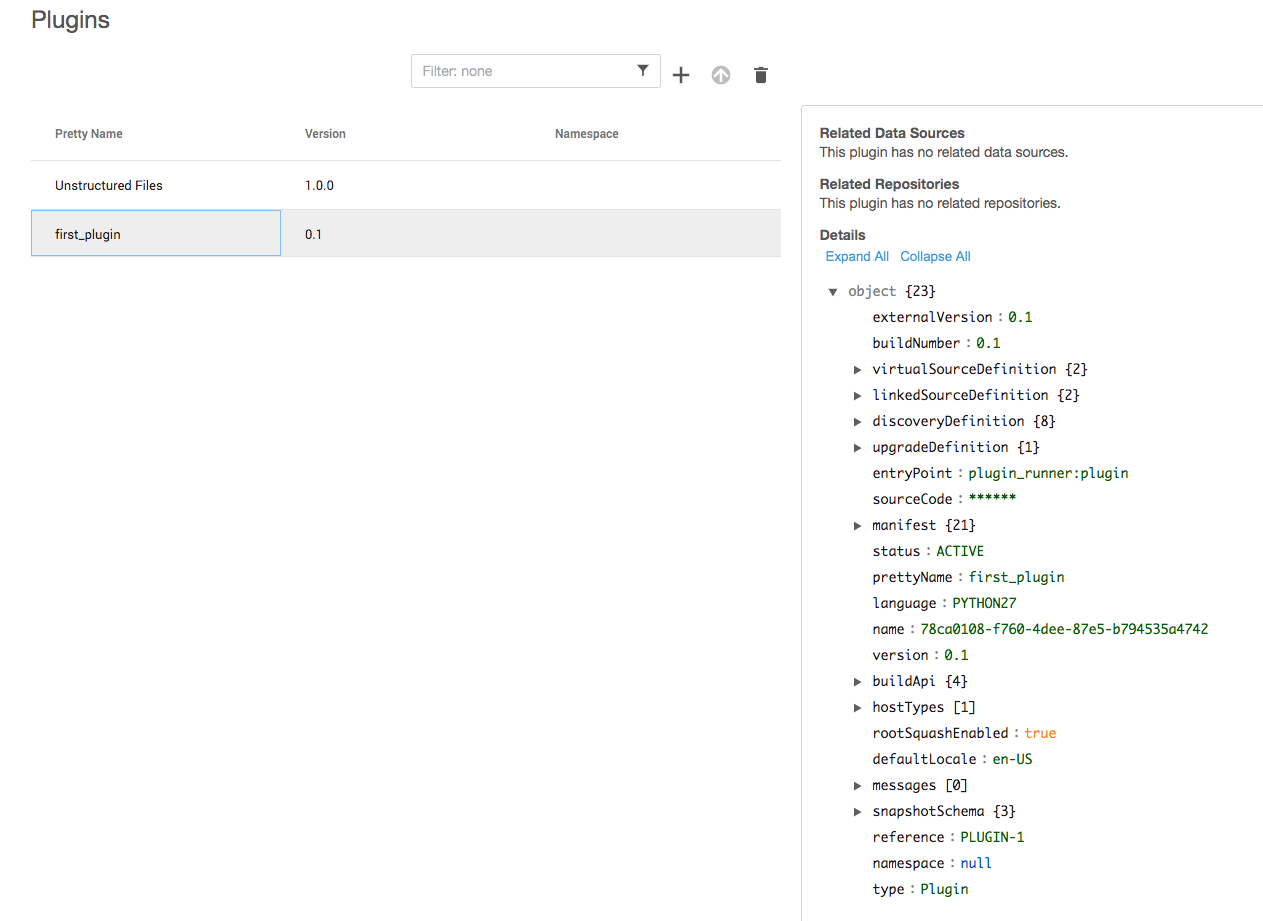
Once the upload is finished, you can verify the installation from the Manage > Toolkits screen in the Delphix Engine UI.